Kombucha Brooklyn’s Eric and Jessica Childs recently joined us at Edible Institute to discuss the growing culture (har har) around fermented foods.
Fermented projects are a fun, low-risk, low-commitment way to get adventurous in the kitchen. Kind of like your favorite slow cooker stew, once the initial prep is done, the magic happens while you wait. The fine folks at Kombucha Brooklyn have made an art and a living from this ancient fermented tea, and so who better to show us the ropes of our first brew?
You might tend to balk at DIY kits — or maybe that’s just me — but read ahead to see if a home brew kit, like Kombucha Brooklyn’s, is right for you. Kit or not, there is something to be said for optimizing this process with expertly chosen materials, and a DIY home brew can be just as delicious as the already bottled product.
We visited Kombucha Brooklyn founder Eric Childs in his Pfizer building office to see how it’s done.

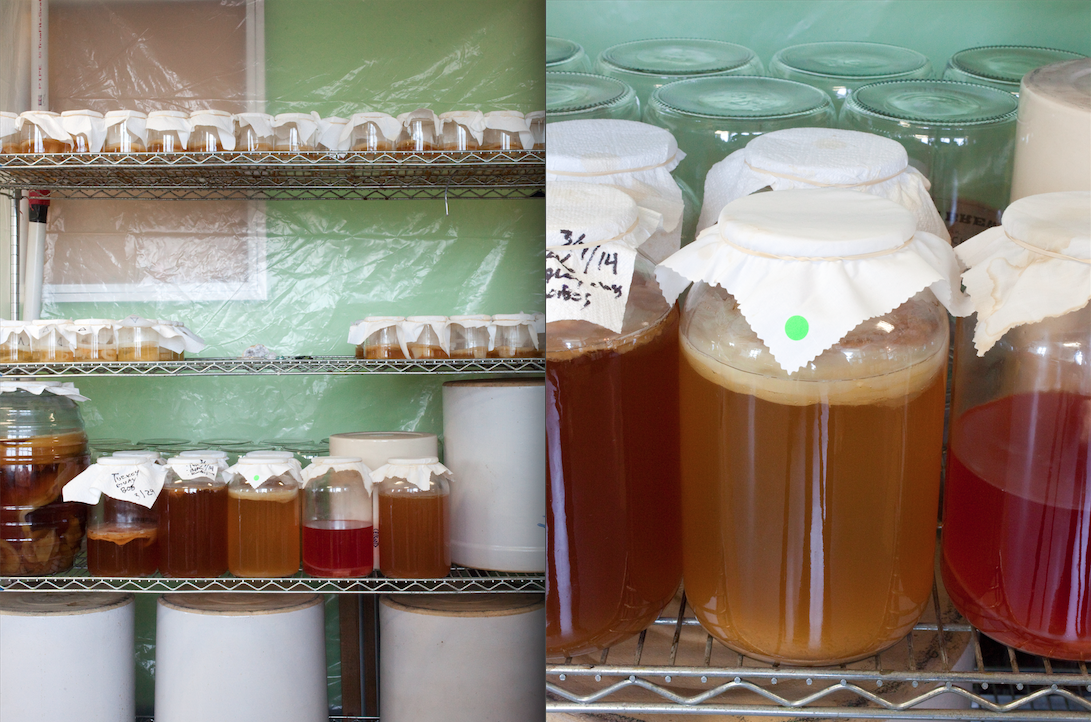
On the top shelves of their office are the SCOBYs (“Symbiotic Colony Of Bacteria and Yeast,” a.k.a. “mother”) that will be adopted by loving homes. They feed on cane sugar and a finely tuned blend of green, black and white teas in a process just like home brewing. The green tea makes for faster fermentation. The black adds nitrogen to the mix (which makes the SCOBY stronger) and the white tea balances flavor.
“SCOBYs behave in a way that is quite similar to a multicellular organism. Having the good sense to take advantage of one another’s strengths in a very competitive evolutionary playing field, the SCOBY community is organized in distinct yeast and bacterial layers that together have functions that exceed the sum of the parts,” says Eric and his wife/business partner Jessica Childs in their book Kombucha! The Amazing Probiotic Tea That Cleanses, Heals, Energizes, and Detoxifies (below is a basic set of instructions that will take you from tea to kombucha perfectly well, but for advanced techniques and an impressive level of digestible detail and troubleshooting, the book is a great resource). Despite the identical DNA, each SCOBY has a unique shape, which speaks to the big effect tiny factors like temperature, tea strength and light can have in the brewing process.
The Kombucha Brooklyn team emphasize though, that everything they are doing can be done at home; they just want home brewers to have the best chance of making the best end product. Just like beer or coffee, brewing at home can be great, but sometimes you need an expert’s opinion.
If at any point you have a question about the kombucha homebrewing process, you can reach out to Kombucha Brooklyn at HomeBrew [at] KombuchaBrooklyn [dot] com or connect with them via their social media profiles.

To make 1 gallon of kombucha, you’ll need:
• Clean kitchen towel for cleaning up any mess
• ⅞ gallon (14-cups) cool water (ideally filtered or bottled water)
• Water heating unit (pot on a stove works just fine)
• Mixing pot
• 8-ounce (1-cup) measuring cup
• 1 rubber band, large enough to fit around the neck of your chosen fermentation vessel
• Liquid measuring cup
• pH strips (optional)
• Thermometer: A sticky thermometer on the vessel or an instant-read ambient thermometer a few inches away will do just fine, but don’t skip this one! SCOBYs only like temperatures ranging from about 72° to 82° Fahrenheit (you can stray a couple degrees above and below) during their fermentation cycle.
• Large mixing spoon: Along with wood, all approved fermentation vessel materials (see below) will do.
• Fermentation vessel: This container can be glass, ceramic, plastic or stainless as long as no toxic glazes or plastic (e.g., lead glazes, non-food-grade plastics, 400-series stainless steels and so on) are in play. Clear vessels are more fun for beginners. Ceramic or stainless vessels are more expensive but will garner more street cred.
• 13 g (about 6 standard bags) tea: There’s no one answer here, but keep in mind that the kind of tea that you choose helps determine the overall taste and the amount of caffeine that will be in the final product. Black, green and white teas are common choices, and you might also consider making a blend with a few different teas. Kombucha Brooklyn recommends several different kinds, including English Breakfast (black), Dragon Well (green) and Shu Mee (white).
• 1 cup cane sugar: The vast majority of SCOBYs are best off when fed pure white cane sugar. Using a different sweetener changes the nature of the fermentation and you will have to actually train your SCOBY if you choose to do so. If you’re just starting out, we recommend you stick with the white cane sugar for simplicity’s sake.
• 1 cup of liquid starter: As the book says, “THIS IS A CRITICAL INGREDIENT TO A SUCCESSFUL HOME BREW.” To get your SCOBY fermentation party started, you can use already fermented kombucha as the liquid starter. If you don’t have any kombucha on hand, you can use three tablespoons of distilled white vinegar per gallon.
• SCOBY: The heart of kombucha-making is the living organism that brings about the beverage’s fermentation magic. The SCOBY is the fuel, the heart and the engine of kombucha’s fermentation, and as most cynical food lovers know, one can be grown from the mother at the bottom of your store-bought bottle. But as Childs says, one of the most common misconceptions about the ancient health tonic is the ease of growing one’s own SCOBY. He encourages home-brewing with a professionally grown SCOBY for optimum results.“However you get your SCOBY, choose your source wisely. The microbial participants, genetic makeup and overall health of your SCOBY will dictate the product it makes, both in flavor and in healthfulness,” say Eric and Jessica in Kombucha!
• Cloth cover: The cloth should be a natural fabric that can let air pass through without bugs or dust getting into you brew. Childs recommends a clean T-shirt or dish towel. Cheese cloth and like-woven fabrics are too open.

Once you’ve assembled all of your equipment and ingredients, find a clean workspace in your kitchen, lay out your materials and scrub your hands.

1. Brew a pot of very strong tea one quarter the size of your brewing vessel (so about 4 cups in this case). Any tea will do (see above), but quality begets quality here. By “very strong,” you’ll probably want to brew your tea for about 20 minutes before squeezing and removing the bags. In these photos, Kombucha Brooklyn uses loose leaf tea in a beaker that they then strain through a sieve.

2. Stir in 1 cup of cane sugar until it’s entirely dissolved.
3. Dilute the sweet tea with cool water so that it is chilled enough for the SCOBY to be introduced (below 90°). This solution is called the “nute.” Both the nutrients in the tea and the energy from the sugar will feed the bacteria and yeast.

4. Pour the nute solution into your chosen sterilized fermentation vessel. Be sure to check that the temperature of your nute is below 90° before continuing to the next step. Be sure to cover your vessel if you need to let it sit and cool off for a bit.
5. Add 1 cup of already brewed kombucha — aka your “liquid starter” — to adjust the pH of the brew and ensure the best environment for the SCOBY to flourish.

6. Then it’s time to drop in the SCOBY and cover the jar with your cover cloth and a rubber band.
7. Keep in a warm place but out of direct sunlight. Holding a temperature between 72° and 82° is ideal.

As the new SCOBY grows and the brew gains its healthful qualities through fermentation, a lot can happen in that vessel and some of it will not be pretty. The good news is that there is very little that can make you sick from this process, even if your first brew is less than perfect. Mold will only grow if temperature is not properly maintained, tea is not properly strained or starter is not properly added. If you have any concerns, you can send any photos or questions to Kombucha Brooklyn and they’ll be happy to advise.
About 9 to 14 days later, you should have finished kombucha. If you shoot for earlier, your kombucha is likely to be sweeter (pH of about 3.1), while if you aim for later, the kombucha will probably be a bit more dry in comparison (pH of about 2.7).
Drink it all (while considering saving some liquid to be used as a starter for your next batch) or add juices or more tea for flavor and bottle it up. Whichever you choose, definitely taste it before to decide if you’re ready to transfer it to the fridge to stop the fermentation process, or continue fermenting for about another week to yield a healthful vinegar.

Kombucha Brooklyn gives each variety of kombucha a name, too; our batch is “Edible bud.” What will you name yours?
Photo credit: Evan Sklar